Why do you need classes?
Classes are a great way of tagging transactions in QuickBooks Online, so that you can have better analysis of your financial data in your reporting. For example, in an ecommerce setting, you can tag each transaction with the name of the sales channel. Then, when you run a report, you'll be able to see statistics on each sales channel separately.
How to enable classes?
Class tracking is only available on QuickBooks Online Plus or Advanced plans.
- Go to Settings and select Account and settings.
- Select Advanced, then select the Categories section to edit.
- Turn on the Track classes switch.
- Select Warn me when a transaction isn't assigned a class. This is optional, but it means that when you look at reports, you know everything's been classified.
- Under Assign classes, select One to entire transaction or One to each row in transaction.*
- Select Save, then Done.
*Tip: Select One to entire transaction if you don't need to enter a class for each product you sell to a customer. You can save time and assign one class to the entire invoice or sales receipt instead. This adds a class field or column to your forms so you can assign transactions a class.
**Tip: For QuickBooks Online Advanced users, this setting may have moved to the Company section.
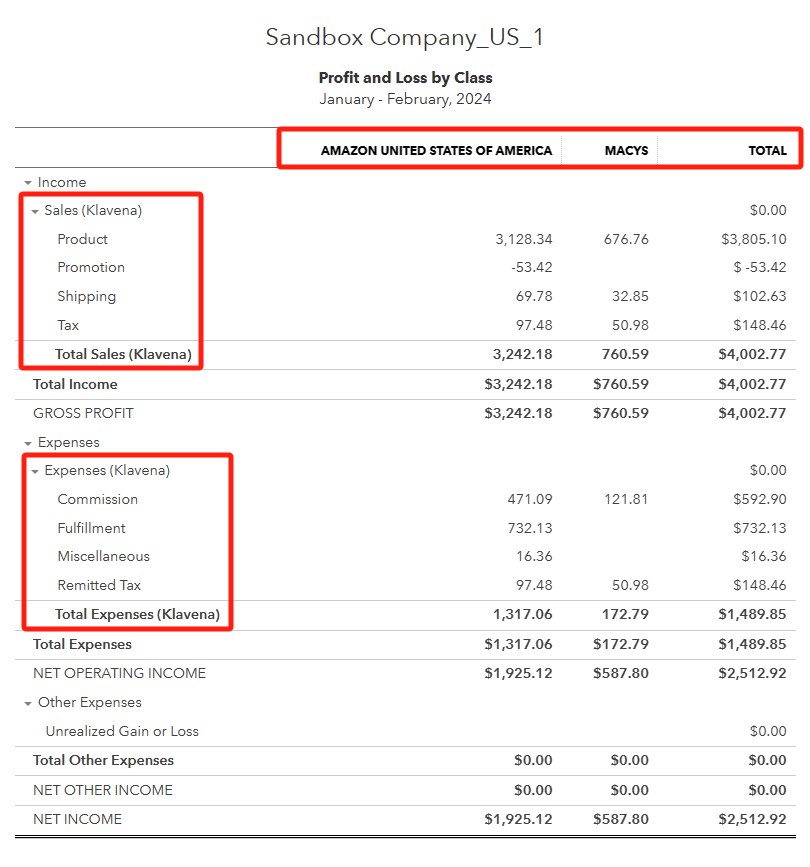
Profit and Loss report with classes
In the following example, we can see how adding classes to your transactions will help you view your Profit and Loss in more granular detail. In this case, we can see our P&L by sales channel, instead of just overall.